Recently, my Cub Scout Wolves took part in our pack’s Annual Blue and Gold Dinner or Banquet. This year’s theme was Survivors, and it was a huge hit with the cub scouts. Planning a large event like this is a huge task, but lucky for me, my sister is a planner and a great organizer. She put together a cohesive theme that included reference pictures, a time table and a task list. I volunteered to to make the centerpieces, decorations and the props for the photo station.

For the Blue and Gold Dinner, we needed a total of 20 centerpieces. This meant a lot of toilet paper, paper towel rolls and wrapping paper tubes.
Items Needed

- Toilet paper, paper towel rolls and/or empty wrapping paper tubes
- Acrylic paint in shades of brown and beige
- Plaster wrap or Plaster cloth (I used Scene O’Rama Plaster Cloth and Art Minds Plaster Cloth
- Scrap book paper, handmade paper or tissue paper in red, orange and yellow
- 12 inch card stock or cardboard base
- Brushes and sponge/foam brushes
- Hot Glue or any type of paper glue
- Exacto Knife and scissors
Forming the Campfire Base
Arrange the paper towel rolls, toilet paper tubes and wrapping paper tubes in the shape of a campfire. There is no right way to do this, and of the parents that were helping me, each person had their own way of forming the base.
Steps:
- Take a paper towel roll and glue it diagonally, ” \ ” on the paper.
- Take a second paper towel roll and cut it in half. Take one of the pieces and glue it perpendicular to the paper forming a “T”. Then glue the second part to the opposite side and forming an “X”.
- To form the second layer, you will need 4 toilet paper tubes or rolls.
- Glue a toilet paper rolls in the space made from the previous step. Glue one end of the toilet paper roll on the paper towel roll and the other end to the paper base.
- Add more toilet paper rolls as needed to fill out the base.
- Please note, if you do not have the desired length, you can piece together paper towel rolls with toilet paper rolls.
Adding Texture to the Base
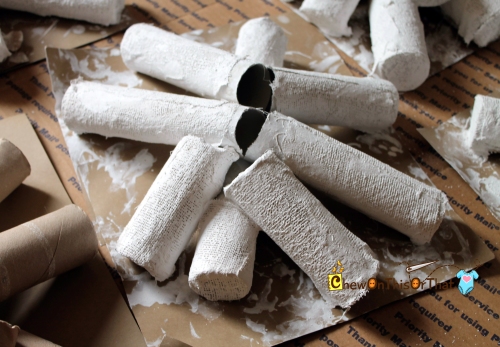
- On a covered surface, cut the plaster cloth into 2 to 3 inch strips and 2 to 3 inch squares.
- Fill a shallow bowl with an inch of water.
- Dip a small square into the water, and cover each end of the paper towel and toilet paper rolls. When using the strips and squares, hold firmly to both ends and apply bumpy side up.
- After the ends are covered, use the strips to cover the rest of the campfire. For best results, measure and cut each strip before it is dipped in water. Allow the base to dry for 6 to 12 hours.
*Please note, the directions provided are from Scene O’Rama Plaster Cloth and Art Minds Plaster Cloth. Please refer to your package of Plaster Cloth for precise directions and curing time.
Painting the Campfire Logs
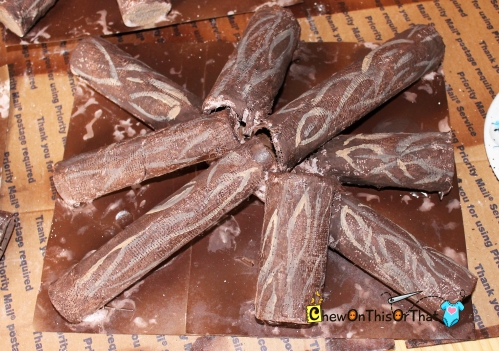
Paint each log dark brown and each end medium brown or tan. To give the logs a more realistic look, paint squiggle lines and swirls in light brown or tan.
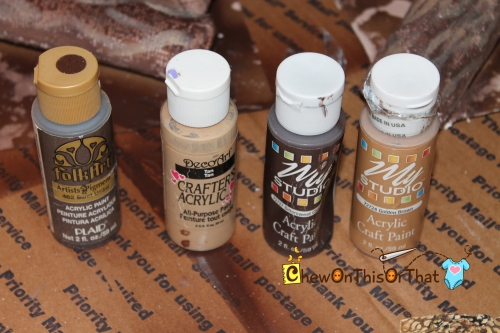
To paint the centerpieces, I used acrylic paint that I had on hand. These include the following:
- Folk Art #462 Burnt Umber and My Studio 72727 Bittersweet for the base
- My Studio 72724 Golden Brown for the ends
- Deco Art Tan for swirls and squiggle lines
Making Campfire Flame

- To form the flame red, yellow and orange textured paper were cut into various sized triangles and a toilet paper roll was cut into 2 inch segments.
- Take a triangle and fold two edges in and staple to base.
- Repeat this step until the base is completely covered with red.
- Next form the same shape with the orange triangle and staple it to the base and on top of the red. Continue this step 2 or 3 more times.
- Now repeat the above steps for yellow.
- You can either leave the flames separated as in the above picture or you can glue the tips together as in the first picture.
- Finally, glue the flame to the centerpiece.